Showing posts with label Jan Weisblat. Show all posts

06 December 2013

Cooking and Thinking in Provence, 1970


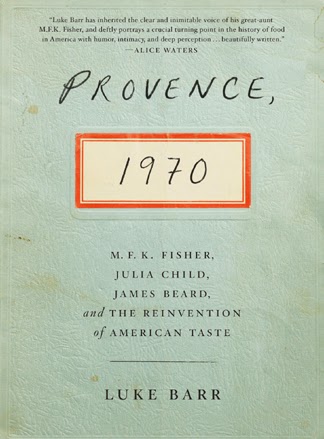
I review a lot of books for my local newspaper. I can’t remember the last one that spoke to me as Provence, 1970 has.

Subitled “M.F.K. Fisher, Julia Child, James Beard, and the Reinvention of American Taste,” the book was written by Luke Barr, an editor at Travel + Leisure and Fisher’s nephew.

(M.F.K. Fisher, in case you haven’t read her, is another great read, perhaps the first American to write culinary essays that were taken seriously by both food lovers and literary critics.)

The book hones in on a few weeks toward the end of 1970 when six food luminaries converged in the South of France. In addition to the three writers in the subtitle, Barr writes about Simone Beck, Julia Child’s friend and the co-author of Child’s pioneering volumes on Mastering the Art of French Cooking; Richard Olney, an American writer and artist who wrote meticulously researched books about traditional French country cooking; and Judith Jones, the influential editor who worked with most of the writers involved.

Jones is the only major character in the book who is still alive. At 89 she is still cooking and writing and is a former judge at my very own hometown’s charity pudding contest, which will return in 2014.

Working from letters, diaries, and memoirs, Barr examines individuals and cultures at a defining moment. Most of his American characters had made their reputations (and built much of their lives) paying tribute to traditional French cuisine. At this point in their lives Child and Fisher in particular were beginning to feel ever so slightly oppressed by the Old World and their old lives in France … and to look forward to a new beginning in the New World.

Barr argues that this moment in food history, the time his characters spent together in Provence late in that year, marked a turning point in the way Americans write about food and consequently in the way we cook. Instead of trying to duplicate classic French modes of food preparation, we began to explore our own culinary possibilities.

Much of the food culture we now take for granted followed—including our renewed interest in local, fresh food; the status of chefs and food writers (although not this food writer yet, alas) as icons of popular culture; our curiosity about new, varied flavors; and what Barr calls the “moral dimension” of cookery in contemporary America.

Barr is careful not to overstate his argument; he doesn’t claim that these encounters in Provence CAUSED the way we cook today. He does convincingly maintain that his characters and their interactions “provide a unique, up-close view of the push and pull of history and personality.”

Provence, 1970 takes the reader on a thought-provoking, delicious tour of a remarkable time, place, and group of people. My favorite moment in the book comes when Julia Child and James Beard are improvising a simple supper in the kitchen at la Pitchoune, the small house built by Child and her husband Paul in rural France.

Julia Child and James Beard at la Pitchoune in December 1970, taken by Paul Child. Used with permission from/courtesy of the Schlesinger Library, Radcliffe Institute, Harvard University
 
For them, as for most of us who love to cook, the preparation of a meal is a balancing act between the knowledge and tradition they have built up over the years in the kitchen and the demands of the unique foodstuffs in front of them. It is an opportunity for creativity and for camaraderie.

I treasure Provence, 1970 for scenes like the one in the Childs’ kitchen and also for its implicit message that change can come at any age. All the main characters are middle aged, ranging from Richard Olney at 43 to James Beard at 67. Yet all are preparing for new chapters in their lives and new chapters in books.

Above all, I love the book for Barr’s sensitivity to the enduring connections that food can forge between people who care for one another and for the preparation and consumption of meals.

His words about his mother near the end of the book speak to the impulse that made me call this blog In Our Grandmothers’ Kitchens.

It was my mother, who died a few years ago, who taught me to cook. And when I make something she made for me, or with me, I feel her presence—not in any literal or even ghostly way, but in the form of an atmospheric shift, an emotional warmth. It is striking how cooking binds us to the past, and to the people we love, even when they’re gone.

As Christmas approaches, I raise a glass and lift a fork to Luke Barr and to the historical figures he brings to life in his book. And of course to my own late mother—and to you and those you love, dear readers.

Taffy and Tinky in 2009
P.S. If you have already purchased Provence, 1970 for a food lover on your list and are looking for other holiday-gift suggestions, a bookstore, Amazon, or I would be more than happy to sell you a copy of my own Pulling Taffy or Pudding Hollow Cookbook. (If you order from me, you may get your copies signed—and you will be supporting THIS middle-aged food writer!)

13 July 2012

In Memoriam Pimiento Cheese

The ingredients in a bowl....
Last Saturday my family and I gave a gala party to celebrate the life of my mother Jan (a.k.a. Taffy), who died in December. We delighted in good food, good drink, and good company.

Being basically lazy, I asked guests to bring food, which they did in abundance. Pam brought tea sandwiches, Debbie brought potato salad, Trina brought the biggest green salad I have ever seen, Ruth brought shrimp, Peter brought MORE shrimp in a salad with artichokes and cilantro pesto, Mary Stuart brought quinoa, Leslie brought delicate cookies, Mardi and David brought watermelon, and so on.

SOMEBODY brought champagne. (I have no idea who, but it was very nice indeed.)

My family supplied tubs of Bart’s ice cream with homemade sauces and tested a recipe from our friend Lark Fleury for pimiento cheese.

Lark tells me that after fried chicken this cheese is the most popular funeral-related food among her neighbors in coastal Alabama. (I wasn’t about to mess with fried chicken in hot weather!)

Her recipe is quite different from my usual one; the mustard, onion, and relish add complexity to the spread. I gave most of the cheese to our friend Pam to put in some of her tea sandwiches, but my family also tried a bit on crackers. I know my mother would have approved.

If you’d like to read more about the party, visit my non-food blog for a full report.

Lark’s Alabamian Pimiento Cheese

Ingredients:

1 pound sharp cheddar cheese, finely grated (it won’t surprise regular readers to learn that I grated it rather coarsely, I’m sure)
1/4 cup of grated onion
1 4-ounce jar diced pimentos drained (I may have used a little extra pimiento)
2 teaspoons prepared mustard
1/2 cup sweet pickle relish
1/4 cup mayonnaise (more or less)
a dash of pepper

Instructions:

Combine all the ingredients, beginning with just a dab of mayonnaise and adding more until the cheese is spreadable.

Spread on bread/crackers or make small sandwiches. Store leftovers in the fridge.

Makes about 1 quart.

I THOUGHT I had taken a photo of the cheese in sandwiches, but it's not in my camera. So here's a better picture ... of the party's honoree last year....

21 January 2012

Funeral Baked Meats

My friend Alice from Dallas and I talk from time to time about writing a book called “Food to Die For.” Like most Americans, Alice and I grew up in communities in which cooking was the natural thing to do when a friend, relative, or neighbor died.

Sometimes there isn’t much one can do for the bereaved other than feed them. Food represents all the love we feel, all the caring remarks we’d like to make, and all the memories we cherish.

And let’s face it: cooking is a heck of a lot more constructive than crying.

Alice grew up in Louisiana so her family brought gumbo, jambalaya, and pralines to the bereaved. I grew up in the northeast so my family tended toward more standard New England-y comfort food—ham, macaroni and cheese, and brownies.

I know people who bring bagels and lox to houses of mourning, as well as stews, soups, cookies, and lasagna. The trick is to identify comfort foods that can be prepared in advance and don’t take much effort to reheat.

My mother Jan often billed herself as a “specialist in funeral baked meats.” When a neighbor died she quickly and efficiently helped relatives, friends, and neighbors organize the feast after the funeral or memorial service. Sometimes this included the favorite dishes of the deceased. Sometimes the menu consisted of any foods that could be prepared in a hurry.

My mother’s funereal feasts were always well received. People liked (and still like) to munch while sharing memories and condolences.

It seems appropriate then, that my mother’s own memorial service on January 7 was followed by copious and delectable food.

Right after the speeches and hymns at the Federated Church in Charlemont, Massachusetts, the church’s pastoral care committee put on a lavish spread of both savory and sweet finger food. It lived up to my memories of the events catered by the now defunct Charlemont Ladies Aid Society.

Later in the day relatives (some by blood, some in spirit) gathered at our house to chat about Jan and life … and of course to eat and drink some more.

Not being my mother, who liked to be thorough and was highly organized, I didn’t make both a turkey and a ham. I made only a ham. (Actually, I didn’t even make it myself since when my neighbors Will and Lisa offered to do something I handed the ham to them for baking!) There was plenty of food, however.

My friend Peter, who considered himself Jan’s third child, brought a huge dish of herbed chicken meatballs. Our neighbors Stu and Cathy prepared the world’s largest bowl of salad. My mother’s honorary goddaughter, Anna, brought fabulous artisan bread. My cousin’s daughter Kyra made yummy cupcakes decorated with snowflakes. And Jan’s aide Pam contributed her dense, delicious applesauce cake.

I had very little to make: a quick appetizer, the salad dressing, my grandmother’s key-lime angel pudding, and a large portion of macaroni and cheese. If I have to be honest, I must say that I didn’t make all of those either since Pam helped A LOT! But I organized them.

Macaroni and cheese was among my mother’s funereal standbys. It is easy to prepare in advance, and it pretty much defines comfort food. So I decided to make it for her.


My standard mac and cheese recipe isn’t elegant and it isn’t rocket science. It’s pretty darn tasty, however. And it comforted me not only to eat it but to prepare it in memory of my mother. She would have enjoyed her party.

The recipe below may be expanded pretty much as much as you like. I hope it graces the table at your next memorial service—or even your next cozy supper party.

Macaroni and Cheese “To Die For”

Ingredients:

4 tablespoons (1/2 stick) butter
1 teaspoon Dijon mustard
4 tablespoons flour
2-1/2 cups milk
paprika to taste
salt to taste
freshly ground pepper to taste (optional)
1 cup grated cheese (sharp Cheddar or Swiss or a combination; a little Parmesan is nice in here, too), divided
1/2 pound cooked and drained macaroni (I like seashells or wagon wheels, but elbows are fine, too)
more milk to taste (optional)

Instructions:

Preheat the oven to 375 degrees.

In a heavy saucepan melt the butter, and stir in the mustard. Whisk in the flour and cook, whisking constantly, for a minute or two. You want the mixture (the roux) to cook and merge but not to get brown.

Add the milk a little at a time, whisking constantly. Bring the sauce to a boil. Add paprika to give it a pink tint plus salt and pepper to taste. I love salt, but remember that the cheese you are about to stir in is salty; I’d start with 1/2 teaspoon and add more later as needed.

Reduce the heat and cook, whisking, for 2 more minutes. Remove the mixture from the heat and use a spoon to stir in 3/4 cup of the cheese. (If you continue to whisk with the cheese, your whisk will get gummy!)

In a 1-1/2 to 2-quart casserole dish combine the macaroni and the sauce. Your casserole should be nice and moist. If for some reason it looks a little dry (this can happen if your cheese is very absorbent), stir in a little more milk. It will evaporate in the oven. Take a tiny taste of your sauce and add more salt if you need to.

Sprinkle the remaining cheese on top of the macaroni mixture, and top with a little more paprika. Cover the dish and place it in the oven.

Bake for 20 minutes; then uncover your macaroni and cheese and continue to cook until it is nice and bubbly, 10 to 15 minutes more. Serves 4 to 6.


30 September 2010

Two Grandmothers' Cake

My mother celebrated a big birthday a few days ago. I won’t say exactly how old she is, mostly because it makes me feel incredibly old myself. Suffice it to say that she is at an age at which every birthday is a big birthday.

We were visiting my brother and his family and faced a couple of requirements for the birthday cake.

It had to be relatively small since all of us (except my mother) need to lose a little weight. And it had to be simple. My brother was in the hospital at the time. He is happily and healthily home now, but we didn’t want to make a complicated family time more complicated.

I had recently rediscovered my grandmother’s recipe for chocolate cake and decided it might fit the bill.

I recalled this cake well from my youth, when it was one of my mother’s standbys for a quick cake. She called it “Mother’s Chocolate Cake” (on my grandmother’s recipe card it is called “My Favorite Chocolate Cake”) and iced it with cream-cheese frosting.

My mother’s own version of the recipe had long since disappeared so I was happy to find my grandmother’s. It’s a great cake—and she was a lovely person. Here is she as she looked when I was little. (I do so admire a woman who can wear hats.)


The recipe turned out to be a teensy bit more challenging that I had imagined.

First, it was just old fashioned enough to be very confusing. My grandmother provided a range of oven temperatures and a range of flour quantities.

Second, she was unclear as to which ingredients were added when.

I standardized it as best I could and proceeded.

In hindsight, it seems to me that one could easily bake this in two layers for a bit less time, but the 8-by-8 inch pan made a nice thick cake that was easy to eat and frost.

According to my grandmother’s recipe card, she used a cooked icing on the cake. I stuck with my mother’s standby cream-cheese version, which is ever popular in our house.

My nephew Michael took charge of decorating the cake. He began with the word “Nana” written in orange lettering. He then went to town with candy corn and sprinkles. At ten, Michael takes the “more is more” school of decorating very seriously.

The birthday girl was pleased as punch with the results.


Tinky’s Grandmother’s Chocolate Cake

Ingredients:

2 ounces bitter chocolate
1/2 cup boiling water
1/2 cup (1 stick) sweet butter at room temperature
1-1/2 cups sugar
2 eggs
1 teaspoon baking soda
2 cups flour
1/2 cup milk
2 teaspoons vanilla

Instructions:

Preheat the oven to 350 degrees. Grease and flour an 8-by-8-inch baking pan.

Place the chocolate in a small saucepan, and pour the boiling water over it. Stir to dissolve, turning the heat below on very low if necessary.

In a mixing bowl cream together the butter and sugar. Beat in the eggs, 1 at a time. Beat in the baking soda.

Add the flour and milk alternately, beginning and ending with the flour. Stir in the chocolate mixture, followed by the vanilla.

Pour the batter into the prepared pan, and bake until a toothpick inserted into the center comes out clean, about 50 minutes.

If you want to be informal and serve the cake out of the pan, that’s just fine. To be a bit more festive, let it cool for 10 minutes and then invert it onto a cooling rack.

Ice with cream-cheese frosting.

Serves 8 to 10.


30 August 2010

Greek Eggplant Pudding

We are not holding our traditional Pudding Hollow Pudding Contest this year. My schedule and my mother’s health make it uncertain that I’ll have the time it takes to put it together in October.

Nevertheless, as fall approaches I think fondly of this fun event. (You may see photos of last year’s festivities here.)

Contestants almost always enter more sweet puddings than savory, but I have a soft spot in my heart and palate for the savory ones.

The recipe below is for what may be my all-time favorite pudding entered in the contest, the Greek Eggplant Pudding from Nancy Argeris of Hawley, Massachusetts.

I ran across a small eggplant at a farm stand the other day and was inspired to throw together a miniature version of the recipe with my mother. We loved its slightly salty, eggplanty warmth.

We used the tiny eggplant plus 2 eggs and about a third of everything else.

We probably could have made the whole recipe since the pudding is delicious the next day. As it was, we finished it off handily with a little help from Truffle, who like me is a sucker for feta cheese.

Her pudding supper filled her up nicely and sent her right to sleep.


The pudding takes a bit of time to put together as it has three stages—soaking, baking, and baking again. None of the stages is difficult, however.

Ingredients:

2 medium to large eggplants
Kosher salt for sprinkling
1/4 cup extra-virgin olive oil (more or less), divided
1 large white onion, finely diced (I used a sweet onion as that's what I had)
2 garlic cloves, finely chopped
6 large eggs
1-1/2 cups crumbled feta cheese
1/2 teaspoon dried oregano or 1 teaspoon fresh (I tend to use a bit more)

Instructions:

Peel the eggplants and cut them into 1/2-inch rounds. (For my smaller version I made the rounds a bit narrower.)

Place the eggplant slices in a colander, sprinkling salt on each layer as they go in. Let them sit with the salt for 45 minutes. Half an hour into this process, preheat the oven to 350 degrees.

When the eggplant slices are through sitting rinse and dry them thoroughly. Lightly oil a baking sheet and place the slices on it, turning so that both sides have been oiled. Bake until the pieces soften, about 30 minutes.

In a small sauté pan sauté the onion and garlic over medium heat until the onion becomes translucent. In a medium bowl whisk together the eggs. Stir in the crumbled feta, the oregano, and the onion mixture.

Oil a 3-quart baking dish and put a layer of eggplant at the bottom. Pour about 1/3 of the egg mixture on top. Repeat the layers, ending with the egg mixture.

Bake for about 30 minutes, until the mixture sets. (Avoid overcooking the pudding. It doesn’t have to be brown.)

Serves 6 to 8.


13 August 2010

A Sauce for Stress

We hope Mother Jan will soon be back to her normal form.

I don’t usually reprint old recipes of mine OR spend much of a blog post linking to another blog. But some weeks are a little crazy—and this has been a crazy week for me!

As we were getting ready to move my mother out of Daffodil Cottage a few days ago she fell and hurt her back. Add to that injury the stress of selling a house and a minor infection, and we have ended up with one sick mother.

Yesterday the doctor suggested it might be time to move her into a wheelchair. (Mother Jan was understandably NOT very excited about this idea. Her gait improved almost immediately!)

A couple of things are getting us through this stressful time. First, we never lose our sense of humor. Even when Jan is a little out of things (as she has been a lot in the past few days) she finds time to laugh.

Second, we have family around. My young nephew Michael in particular is a joy. He has just started his own blog, My World by Michael. It is officially hosted by me since apparently 10 year olds aren’t allowed to have blogs.

Michael’s current post, “Swimming in the Dam at Singing Brook Farm,” is charming. It reminds me of my own recent post comparing our country surroundings to The Trip to Bountiful.

He dwells on the experience of plunging into our cold dam water, on the sights and sounds of nature, and on the cuteness and doggyness of our cockapoo, Truffle.

Check out his post. It’s short and very sweet!

Meanwhile, here is a short and sweet recipe from my Pudding Hollow Cookbook.

When we called the doctor to ask for advice about my mother, one of the first things he suggested was that she eat plenty of ice cream to help her bones heal. Michael immediately volunteered to help.

We tried to keep things healthy by consuming frozen yogurt instead of ice cream. And then we ruined the whole healthy idea by covering the yogurt with this sauce. It made everyone smile, however, even our invalid.

Merry Lion Hot Fudge Sauce

Ingredients:

1 cup sugar
1/4 cup cocoa
1 tablespoon sweet butter
5 ounces evaporated milk (a small can)
1 teaspoon vanilla

Instructions:

Combine the sugar and cocoa in a saucepan and heat them until they are warm to the touch. (This is the only tricky part of the recipe; make sure you stir them, or they'll burn!)

When they're hot but not melting, add the butter and the evaporated milk. Bring the mixture to a boil and boil for 1 minute.

Remove from heat and stir in the vanilla. You're ready to have a sundae party! Serves 8.

Michael can make a toy out of just about anything.

09 August 2010

Adventures in Real Estate

Daffodil Cottage

Regular readers may have wondered at my recent uncharacteristic silence. (In fact, a few of you wrote to ask whether I was all right, which was very sweet.)

I have indeed taken a break from writing lately. My whole family has been busy helping my mother get ready to sell her house in Millburn, New Jersey.

For several years now, she and I have been traveling from Massachusetts (my home) to New Jersey (her home) to Virginia (my brother’s home) and then back to New Jersey and so on.

Frankly, living in three places has been exhausting and confusing for me, let alone the almost 92-year-old Jan!

So this spring she decided to put the New Jersey house on the market. She and I spent a couple of weeks at the house (known as Daffodil Cottage) in June de-cluttering and making sure that all the little repair jobs we had been saving up got done.

We then turned the place over to our realtor, the amazing Wendy Drucker.


Recently, my friend Peter asked me for advice about choosing a realtor. I sent him a long letter, and OF COURSE I can’t find it now. The gist of it was that the ideal realtor understands the unique features of one’s home and looks not just for the most money but also for the best fit for the house and its owner.

I also suggested that the best realtors were rooted in the communities in which they sold property.

Peter told me I was brilliant. Well, of course, I am—but my description of the ideal realtor had nothing to do with my brilliance and everything to do with Wendy’s.

She is cheerful, knowledgeable, and competent—and she cares about my mother, me, and the past and future of Daffodil Cottage. She has found a buyer who wants to bring up his children in Daffodil Cottage. The closing will take place next week!

Whenever we have been in a jam—locating a repairman while out of state, trying to figure out how to get rid of decades’ worth of garbage, looking for a real-estate lawyer who would reassure my mother that selling the house was indeed the right thing to do—Wendy has come through.

She and her terrific husband Chris have spent more time in Daffodil Cottage lately than we have. Chris and my nephew Michael bonded when Chris stopped by to help my brother David install a fire extinguisher in the kitchen.

We call Chris Our Hero. We call Wendy a Goddess. (She is actually Goddess Number One. Number Two is my sister-in-law Leigh, who has been acting as the family organizer and archivist.)

What with all the sorting and packing, we haven’t had much time for cooking. We have eaten some yummy takeout, about which I’ll write soon. But we did invite Wendy and Chris over last week for a quick pasta supper.

We served the simple sauce below over whole-wheat rigatoni purchased at one of Millburn’s best places to shop, Mia Famiglia.

This little Italian deli sells tasty sandwiches and soups, aged Italian cheeses, and crusty breads.

Naturally, we prepared the sauce with Mia Famiglia’s own sausage, which is flavored with tons of fennel. If you can’t shop there (we won’t be able to soon!), you may make it with any Italian sausage you like (I’d mix hot and sweet if you don’t have the natural spiciness we enjoyed)—even vegetarian faux sausage.

Jan and I will be embarking on more adventures in real-estate soon: another experienced realtor, Carol Cooke, is looking for an apartment for us in Virginia. In the meantime, here is the sauce we served to Wendy and Chris.

You don’t actually have to sell real estate to enjoy it.


Daffodil Cottage Pasta Sauce

Ingredients:

12 ounces faux (or real) Italian sausage, cut into small chunks
2 to 3 tablespoons extra-virgin olive oil (use only if using faux sausage or if your real sausage is quite lean)
2 to 3 cloves garlic, minced
another 2 to 3 tablespoons extra-virgin olive oil
1 large can (28 ounces) Italian tomatoes, crushed by hand or with a gentle knife
1 teaspoon salt
1/2 teaspoon black pepper
2 pinches red pepper flakes (or to taste)
1 teaspoon oregano leaves
fresh, chopped basil to taste

Instructions:

In a frying pan brown the sausage chunks, using oil if they are made of soy or are very lean. Drain and set aside.

In another large frying pan or a Dutch oven sauté the garlic in the olive oil just until it turns golden brown.

Add the tomatoes, salt, peppers, oregano, and sausage. Cook this mixture down for at least 20 minutes, uncovered. Stir occasionally. The sausage gets richer and denser if you simmer it for up to an hour; if you want to extend the cooking, make sure you cover the sauce almost all the way after it begins to thicken.

Toss in the basil just before serving over pasta. Top with aged Romano cheese from Mia Famiglia. Serves 4.

Goodbye, arts-and-crafts living room of Daffodil Cottage!

17 May 2010

Let Them Eat Birthday Cake (Part I): 1-2-3-4 Cupcakes

I think I can speak for the entire Weisblat family when I say that we have had enough cake in the past week or so to last for several months.

My nephew Michael turned ten on Thursday. Naturally, a birthday cake was in order.

We ended up making a number of cakes—two identical cakes for his official party the previous weekend (he had invited quite a number of guests), a similar cake for the actual birthday, and cupcakes for his classmates at school.

None of them was hard to make individually—but en masse they pretty much exhausted us.

I do not want to talk about calories here. I will say that we have bought and used a HUGE amount of butter, eggs, flour, and sugar of late. Luckily, the birthday boy and his friends ate most of the cake(s)—and they were very happy indeed.

I’m starting with the cupcake recipe because, frankly, I’m not sure I can write with equanimity yet about the main event—a chocolate, marshmallow-filled cake in the shape of a Washington Capitals hockey puck!

The cupcakes were made with one of my very favorite cake recipes—a simple yellow cake that takes less work than a mix (well, almost). It’s the Platonic ideal of a yellow cake.

This old-fashioned combination is called “1-2-3-4” because it takes a cup of butter, 2 cups of sugar, 3 cups of flour, and four eggs.

If you want only 24 cupcakes (or a 9-by-13 sheet or 2 8-inch rounds), you may reduce the recipe by a quarter to 2-1/2 cups flour, 2 teaspoons baking powder, 3/4 cup butter, and so forth. Be sure to adjust baking times if you change pan sizes. You can probably get 3 8-inch rounds with this version, if you want a high and lovely cake!

Since my family is into excess we piled sprinkles on top of the cupcakes—red and blue for the Washington Capitals, of course (we already had white icing).

The birthday boy took cupcake decoration seriously.

1-2-3-4 Birthday Cupcakes

Ingredients:

3 cups flour
2-2/3 teaspoons baking powder
2/3 teaspoon salt
1 cup (2 sticks) sweet butter at room temperature
2 cups sugar
4 eggs
2 teaspoons vanilla
1-1/3 cups milk

Instructions:

Preheat the oven to 350 degrees. Line 32 cupcake tins with liners.

In a medium bowl, combine the dry ingredients. In another bowl, cream the butter and sugar together until they are light and fluffy. Beat in the eggs, one at a time. Add the vanilla, and beat again.

Add the dry ingredients to the butter mixture alternately with the milk, beginning and ending with the dry ingredients. Pour the batter into your cupcake tins.

Bake for 20 to 25 minutes, or until the cakes pass the toothpick test. Cool on a wire rack for 10 minutes, then remove from the pan and let cool. Ice with snappy butter icing (see below). Makes 32 cupcakes.

Snappy Butter Icing for 1-2-3-4 Cupcakes

Ingredients:

1-1/2 cups (3 sticks!) sweet butter at room temperature
confectioner’s sugar as needed (I think we used a little less than a pound)
2 teaspoons vanilla

Instructions:

Cream the butter and add confectioner’s sugar a little at a time until the icing is tasty and spreadable. Beat in the vanilla. Ice your cupcakes, and throw on some birthday sprinkles if you want to. Ices 32 cupcakes generously.

Grandmother Jan went to town with the sprinkles.

If you enjoyed this post, please consider taking out an email subscription to my blog. Just click on the link below!

Subscribe to In Our Grandmothers' Kitchens by Email.

12 March 2010

Irish Cheese Fondue

I told my friend Peter I was working on recipes for Saint Patrick’s Day—and as usual he came up with a wonderful idea!

He said he had been surveying the variety of Irish cheeses on the shelves in his local grocery store and suggested that I create an Irish cheese fondue.

I picked up some Irish cheddar and threw in some stout. My guests swooned–with the possible exception of my mother, who is not completely convinced that melted cheese constitutes dinner.


If you don’t have access to Irish cheddar, you may use a domestic variety, but the Irish cheddar does have a different flavor. It’s slightly sweeter, I think, and yet a little tangy as well.

Marilyn stirs the fondue.
Ingredients:

2 to 3 cloves garlic, slightly crushed
1 pound Irish cheddar cheese, shredded
2 tablespoons flour
1 cup Irish stout
2 teaspoons Dijon mustard
a few sprinkles of Worcestershire sauce
1 medium baguette, cut into bite-sized pieces
2 apples, cut into bite-sized pieces

Instructions:

Rub the inside of a fondue pot with the garlic; then discard the cloves.

In a bowl toss together the cheese and the flour.

Bring the stout, mustard, and Worcestershire sauce to a boil in the fondue pot. Reduce the heat and stir in the cheese/flour mixture. Continue to stir until the cheese has melted. Don’t be concerned if your fondue is brown: it’s supposed to be!

Dip the bread and apple pieces into your fondue. Yum! Serves 4.

Kay samples the fondue.


If you enjoyed this post, please consider taking out an email subscription to my blog. Just click on the link below!

Subscribe to In Our Grandmothers' Kitchens by Email

24 December 2009

Peppermint-Swirl Brownies


Regular readers may ask whether in fact I didn’t just post a peppermint-brownie recipe. The answer is yes, I did, and I’m not ashamed to admit it!

I don’t believe a cook can combine chocolate and peppermint too often at this time of year. And the two brownie recipes, although both good, are quite different.

This one is a holiday version of a basic cream-cheese brownie. The fudgy base is adapted from King Arthur Flour. The cream-cheese-peppermint layer might be a bit much on any other day of the year, but not on Christmas Eve.

We took them yesterday to lunch with my one of my mother’s oldest friends, Riley Yriart, and her son Juan. My mother and Riley met in France in 1937 and still like to get together whenever they can.

Riley may look a little doubtful about the brownies in the photo below, but she did seem to like them.


Jan (left) and Riley met in college. They still enjoy each other's company--and a little good food and good wine.

Ingredients:

for the brownie base:

1 cup (2 sticks) sweet butter
2 cups sugar
2/3 cup Dutch-process cocoa
1 teaspoon salt
1 teaspoon baking powder
1 tablespoon vanilla
4 eggs
1-1/2 cups flour
12 ounces (2 cups) chocolate chips

for the peppermint layer:

8 ounces cream cheese, at room temperature
1/2 cup sugar
1 egg
1 pinch salt
1 teaspoon peppermint extract
1 or 2 drops of red food coloring (enough to make the mixture a gentle pink–optional)
4 to 5 candy canes, crushed (the more pulverized the better)

Instructions:

Preheat the oven to 350 degrees. Line a 9-by-13-inch pan with parchment paper or foil, and grease the parchment (or foil).

Begin with the brownie base. In a 3-quart saucepan over low heat melt the butter. Add the 2 cups of sugar, and stir to combine. Return the mixture to the heat briefly—until hot but not bubbling. (It will become shiny looking as you stir it.)

Remove it from the heat and let it cool briefly while you assemble the other ingredients.

Stir in the cocoa, salt, baking powder, and vanilla. Add the eggs, beating until smooth; then stir in the flour and chocolate chips. Spoon the batter into your pan.

Next, work on the cream-cheese layer. In a small mixing bowl beat the cream cheese. Beat in the 1/2 cup sugar, egg, salt, peppermint extract, and food coloring (if you’re using it). Gently stir in the candy.

Spoon the cream cheese gently on top of the brownie batter; then use a knife to swirl it around gently.

Bake the brownies until they just start to brown on the very edges (30 to 35 minutes). Remove them from the oven.

After 5 to 10 minutes loosen the edges of the parchment paper or foil. Cool completely before cutting and serving.

Makes about 2 dozen brownies, depending on how large you cut them.

We wish you a Merry Christmas!

20 June 2009

Sylvia Delight

Jan Weisblat and Nicole Vaget with Sylvia’s Yearbook Photo (Courtesy of Mary Fanelli/Mount Holyoke College French Department)


I recently accompanied my mother to her seventieth reunion at Mount Holyoke College. Watching the parade of alumnae—beginning with the Class of 1934 and ending with the Class of 2009–was inspiring. From the old ladies remembering their youth to the young girls looking ahead to their prime, these women in white exuded confidence, humor, and joy.


Members of the Class of 1939 at their Seventieth Reunion (Courtesy of Elaine Nelson)

The college made a great fuss over the Classes of 1934 and 1939, who enjoyed their moment in the sun. My mother particularly loved the hour or so we spent at the French department open house. There graduating seniors and returning alums mingled with faculty and staff.

At the open house I met up with one of my Mount Holyoke professors, Nicole Vaget, who still radiates passion for French history and culture. While we were chatting with Madame Vaget (even years after graduation it took me a while to call her Nicole) we noticed two signs of my mother’s time at Mount Holyoke on the wall of the French department library.

One was a plaque dedicated to her beloved professor Paul Saintonge. Paul and his wife Connie took my mother to France for the first time the summer after her freshman year in college, introducing her to the country and the language that would be her favorites. She still speaks of him fondly.

Above the plaque was a black-and-white photograph of a young woman wearing pearls. It bore a striking resemblance to my mother’s own yearbook photo from Mount Holyoke. “My goodness,” I said to my mother, “that’s Sylvia.”

“Oh,” said my mother in the closest tone to a gush she could come up with (she is emphatically not a gusher), “MY SYLVIA!”


Sylvia Delight Sherk in 1939 (Courtesy of Mount Holyoke College)


The subject of the photo was indeed her friend Sylvia Delight Sherk Hubble, who died in 1993. Her family established a memorial fund in her honor, and the college remembers her daily with this picture.

My mother made many close friends in college, but Sylvia may have been the closest. She lived up to her middle name and was a delight all her life. The daughter of missionaries (she led missionary children out of Iran at the onset of World War II), Sylvia wasn’t the smartest or the most ambitious of my mother’s friends. She was without a doubt the most lovable. She had a childlike enthusiasm for life that was infectious.

When she and my mother got together they were transformed into young girls. My mother would announce, “And now Sylvia Sherk will give her famous hog call,” or, “And now Sylvia Sherk will stand on her head.” Sylvia would comply, and they would both giggle. They probably didn’t help each other learn a lot of French in college. But they obviously taught each other a lot about friendship.

Sylvia’s marriage to Harry Hubbell, a physicist, made her friends from college a little suspicious. They were won over by Harry’s gentle demeanor and his devotion to Sylvia, however. The pair enjoyed hiking, camping, and skiing together and hated to be apart. On a visit to my parents’ home in the 1980s, I recall, they ended up sleeping in a single cot in the guestroom when issued separate beds. “I got lonely without Sylvia,” Harry explained the next morning.

When I was in graduate school at the University of Tennessee, Sylvia and Harry often invited me to their small house in Oak Ridge. There they enjoyed community and church life, bird watching, and their garden.

Sylvia wasn’t the world’s best cook, but she brought her sense of fun to everything she created in the kitchen. I recall the company more than the food during those visits in which she and Harry served as my Tennessee “parents.” Nevertheless, one item she baked stands out in my memory because of its vivid color.

One spring afternoon Sylvia brought to the table the most garish cake I had ever seen. It had one green layer and one orange layer. She explained that she had created it with a cake mix and two different flavors of gelatin. It tasted better than it looked although it was very, very, very sweet.

Years later, when I was corresponding with nutritionists at Betty Crocker about something the company advertised on television in the 1950s, I obtained the recipe for “Color Vision Cake.” This must have been more or less the formula Sylvia used.


A 1952 Advertisement for Color Vision Cake (Courtesy of Betty Crocker/General Mills)

In her honor I recreated it last week. I decided that the single flavor of gelatin in the recipe was probably enough. I also modified the icing slightly, adding more butter and less sugar than the folks at Betty Crocker suggested. It came out a perfect 1950s pink, not unlike the hue of my grandmother’s appliances and bathroom tiles.

Despite its hint of artificial flavor the cake was a hit, particularly with the young and with those who were young at heart like the delightful Sylvia.

I hope that you eat it with lots of milk and fresh fruit (to cut the sugar)—and that you think of someone you love as my mother loved her Sylvia. That affection is a tribute to the lasting friendships nurtured in places like Mount Holyoke.


Color Vision Cake
Courtesy of Betty Crocker

Ingredients:

for the cake:

1 package (4-serving size) fruit-flavored gelatin (I used raspberry)
1 package white cake mix
1-1/4 cups water
1/3 cup canola oil
3 egg whites

for the frosting:

1/2 cup (1 stick) unsalted butter
the reserved gelatin
milk as needed
2 to 3 cups confectioner’s sugar

Instructions:

Preheat the oven to 350 degrees. Grease and lightly flour the bottoms (only) of 2 8- or 9-inch round pans. (The 8-inch pans work a little better.) Measure out 3 tablespoons of the gelatin for the cake; save the remainder for the frosting.

Mix the cake according to the package directions, adding the 3 tablespoons of gelatin. Pour the batter into the prepared pans.

Bake the cakes until a toothpick inserted into the center comes out clean; this should be 27 to 32 minutes for 8-inch pans and 25 to 28 minutes for 9-inch pans.

Cool the layers in their pans on a rack for 10 minutes. Run a knife around the sides of the pans, and gently remove the cake layers to a wire rack. Cool them completely (about 1 hour).

To make the frosting, melt the butter. Beat in the gelatin, a splash of milk, and enough confectioner’s sugar (and perhaps additional milk) to make it spreadable. Ice the cake. Serves 10.


(Courtesy of Elaine Nelson)

18 April 2009

Spring Break: Caipirinhas


“Aren’t we going to Florida this year?” asked my 90-year-old mother recently in what I can only describe as a tone of recrimination.

We had just heard from yet another family member who was either planning or returning from a vacation in a warm spot. We don’t actually go somewhere warm every year. We aim for a spring break every other year—and we were in Key Largo last year. I guess the extended mud season in western Massachusetts was simply getting to the normally stalwart Jan Weisblat.

Unfortunately, our spring was already pretty heavily scheduled. Instead of taking my mother to the tropics, therefore, our family decided to bring the tropics to her. For one fabulous evening we wore leis and dined on foods that are not native to the northeast.

OF COURSE, we started with a cocktail! I am so old fashioned that I thought the tropical drink of choice was a piña colada or a mango margarita. My more sophisticated brother David and his wife Leigh informed me that the chic crowd now sips a caipirinha. This Brazilian limeade packs a major punch, thanks to a sugarcane-based liquor known as cachaça. My brother actually found cachaça in a liquor store. You may substitute white rum or vodka if you like, however. Non-drinkers like my nephew Michael and me may simply use seltzer.

Feel free to vary the formula below depending on how sweet and/or strong you like your cocktails. My sister-in-law Leigh likes her caipirinha with three teaspoons of sugar instead of two. My mother likes it with three or FOUR teaspoons of sugar (make sure it dissolves if you try this), only a few drops of cachaça, and a lot of seltzer.


Ingredients:

1 lime
2 teaspoons sugar
enough crushed ice to fill a cocktail glass
cachaça as needed (probably about 2 ounces for a non-seltzer-using drinker)

Instructions:

Roll your lime along a table- or countertop several times to release the juices. Wash the lime. Cut it in half (saving the second half for another drink!), and cut away and discard the white center strip.

Cut the lime into pieces, and place the pieces (pulp side up) either in a glass or in a mortar bowl. Place the sugar on top. Use a pestle or clean wooden stick to crush the lime and sugar together for a short time.

If you have used a mortar bowl, put the sugar/lime mixture in a glass (otherwise just leave it in the glass!). Fill the glass with crushed ice, pour in cachaça to the top of the glass, and stir well. Pop in a straw or a festive umbrella, or just decorate the glass with a bit of lime.

Makes 1 potent caipirinha.

One of the advantages of having your tropical spring break at home is that your pets can come along. Tuffle was happy to participate in ours........


14 December 2008

Jan's Killer Fruitcake


Belatedly, my mother and I are now getting around to making fruitcake. Fortunately, our family and friends will gladly eat it in the new year rather than at Christmas. As true fruitcake bakers and eaters know, fruitcake is most properly prepared around Thanksgiving. Ideally, it should have a few weeks to season before it is consumed.

Fruitcake is often the subject of jokes, and I myself have been known to sing “Grandma’s Killer Fruitcake” at this time of year. Nevertheless, in our family fruitcake baking is an almost sacred ritual that connects me to my mother Jan and her mother Clara. It’s as much about that chain of bakers as about the end product.

I’m sure I’m not the first home baker to fall in love with Truman Capote’s touching story from 1956, “A Christmas Memory.” First published in Mademoiselle magazine, of all places, this reminiscence sketches for readers the loving relationship in the 1930s between Capote as a child and his cousin, Sook Faulk. On the inside this sixty-odd-year-old woman was, as the author recalls, “still a child.”

The two are allies and best friends, misfits in a home of adults who are nameless in the tale and who seem to care little for the odd couple in their midst. The highlight of the year for young “Buddy” and his friend is the time in November when the two break into their piggy banks, shop for ingredients, and bake 30 fruitcakes. The fruitcakes make their way out into the larger world, presented to people who seem interesting or significant to the bakers, from President Roosevelt to an itinerant knife grinder.

The story is brilliantly written in the present tense, giving the reader an immediate sense of being a part of the two protagonists’ world and their baking ritual. Capote repeats several times the phrase with which his cousin announces each year that the time to begin baking has come: “It’s fruitcake weather!”

“It’s always the same,” he explains.“[A] morning arrives in late November, and my friend, as though officially inaugurating the Christmas time of year that exhilarates her imagination and fuels the blazes of her heart, announces: ‘It’s fruitcake weather! Fetch our buggy. Help me find my hat.’”

I love the insight this story shows into the ways in which cooking and food can bind us to other people and our recollections of those people. The Truman Capote who is narrating is two decades and more than a thousand miles from his cousin’s memory; toward the end of the story he explains that not long after the Christmas he recalls in minute detail he was sent away to school. She died before he could see her again.

Nevertheless, by telling the tale of their baking adventures—their marshalling of resources, the creation of their shopping list, their daunting encounter with the bootlegger who supplies the whiskey that preserves the cakes–he brings both his younger self and his beloved cousin back to life.

The story makes every reader pine for the wonder of childhood. I’ve participated in a fair number of local theatrical productions. The only time I ever had to wear waterproof mascara was when I played the part of the older cousin in staged readings of “A Christmas Memory.” I couldn’t make it to the story’s end without crying. I still can’t.

So let’s all bake fruitcake—for Truman Capote before he “became” Truman Capote, for lost cousins everywhere, for our mothers and our grandmothers.

Capote writes in the story that he and his cousin kept scrapbooks of the thank-you notes they received from the scattered recipients of their cakes, notes that gave them a feeling of connection “to eventful worlds beyond the kitchen with its view of a sky that stops.”

Cooking gives me that feeling of connection every day, but particularly when it’s fruitcake weather.


Image Courtesy of Random House

Jan’s Killer Fruitcake

Ingredients:

1 pound fruitcake fruits (I particularly like the not too sticky ones from King Arthur Flour)
1 cup slivered almonds
1 cup raisins, cut in half
1 cup currants
1/2 cup orange juice or sweet cider
1/4 cup molasses
2 tablespoons brandy, plus brandy for seasoning
1 teaspoon cinnamon
1 teaspoon nutmeg
1 teaspoon allspice
1/2 teaspoon mace
1-1/2 cups sifted flour
1/2 teaspoon salt
1/4 teaspoon baking soda
1/2 cup (1 stick) sweet butter at room temperature
3/4 cup firmly packed brown sugar
3 eggs

Directions:

Preheat the oven to 300 degrees. Combine the fruit, nuts, juice, molasses, 2 tablespoons brandy, and spices in a large bowl. Mix them together well, and let them stand while preparing the batter. (If you leave them for several hours or overnight, so much the better; you may use them almost immediately, however.)

Sift together the flour, salt, and baking soda. In a separate large bowl, cream the butter and sugar together, and beat them until they are fluffy. Beat in the eggs 1 at a time. Stir in the flour mixture, and then fold in the fruit mixture.

Line 2 greased loaf pans with well greased parchment paper, and divide the batter between them. Bake the cakes until a toothpick inserted into the center comes out clean. This may take up to about 1-3/4 hours, but start testing at the end of 1 hour just to be sure.

Let the cakes cool completely in their pans. Remove them carefully. Wrap them in cheesecloth, and drizzle brandy over the cheesecloth. Cover the wrapped cakes in foil, and seal them in plastic bags. Stow them away to season as long as you can. Optimally, you should wait at least 3 weeks before serving them, but you may certainly try them as soon as 10 days after baking. If you want to keep them for more than 3 weeks, you may have to drizzle on more brandy from time to time.

Makes 2 loaves.

A few years ago NPR’s This American Life aired a vintage reading of “A Christmas Memory” by Capote himself. To hear it and more, click here, and look for the December 19 edition of the program. And to hear me make fruitcake and sing a few strains of “Grandma’s Killer Fruitcake” (not terribly well) on public-radio station WFCR, try this link.

Mother Jan is getting ready for Christmas!


10 December 2008

North Meets South Pecan Pie


Pie is a grand old tradition for the holidays. There’s love in every pie crust–particularly in our home, where my 90-year-old mother Jan is the designated crust roller.

Everyone has a favorite flavor for holiday pie. As far as I’m concerned, you can keep your apples and your squash. Give me a pecan pie, and I’m so happy I could sing (and frequently do)!

This recipe combines two of my favorite ingredients—Southern pecans and Northern maple syrup. It comes from the recipe files of my sister-in-law’s grandmother, Lois Bullard of Memphis, Tennessee. The delicate maple flavor makes the pie taste less sweet and syrupy than many of its molasses- or corn-syrup-based brethren.

Ingredients:

3 tablespoons sweet butter at room temperature
1 cup light brown sugar
2 eggs, beaten
2 tablespoons flour
1 pinch salt
1 cup maple syrup (I like to use Grade B)
2 cups pecan halves
1 9-inch unbaked pie shell

Instructions:

Preheat the oven to 400 degrees. Cream together the butter and sugar. Beat in the eggs, flour, salt, and syrup. Stir in the pecan halves, and mix well. Pour the mixture into the pie shell. Bake for 5 minutes; then reduce the temperature to 375 degrees. Bake until the mixture just sets, 30 to 40 minutes, being careful to avoid burning. Serves 6 to 8. A little whipped cream on the side gilds this lily in decadent fashion.


Rolling Pie Crust with Love: Jan in the Kitchen

25 September 2008

Ninety Years in the Making


Tomorrow– September 26, 2008–my mother Jan turns 90. (Obviously, she was incredibly old when I was born since I’m only 39.)

For years and years she took care of me, exhibiting common sense, humor, and a complete inability to feel guilt. I have never been able to fathom that last characteristic. I feel guilty at the drop of a hat. If my mother makes a mistake, she says, “Oh, well”; apologizes; and promptly forgets about the whole matter. I think her non-guilt is one of the things that has kept her going all these years.

These days, of course, it would be fairer to say that we take care of each other. She had polio in the early 1950s, and her balance is far from good. She gets frailer by the month. She frequently forgets to eat (something I can’t imagine myself doing, alas, even at 90!). Consequently, she needs a little help getting around, fixing meals, turning on the television set (why is it that remotes become increasingly difficult to use even as the American population ages?), remembering which pills to take. I give that help cheerfully—most of the time.

She still helps me as well, however. When I’m cooking something challenging she pitches in in the kitchen, serving as sous chef and dishwasher. When I’m frazzled she calms me down. Best of all, she provides an example of cheer and grace I’d love to emulate. We don’t always agree, but we always appreciate each other.


The year after I graduated from Mount Holyoke College, I visited the campus and fulfilled one of my undergraduate dreams by attending the weekly faculty happy hour. I met Roger Holmes, a professor emeritus who had known my mother in the 1930s. I asked him whether he remembered her and rattled off her maiden name and graduation year. He sipped his drink, nodded, and murmured appreciatively, “Short and full of life.” Those five words still describe Jan Hallett Weisblat pretty darn well.


Here’s a pudding my mother entered in the 2006 Pudding Hollow Pudding Contest. She obtained the recipe from her mother, Clara Engel Hallett, who taught her to cook as Jan taught me to cook. It’s lovely and light—and tastes even better with key-lime juice and rind instead of lemon. I’m thinking of putting a candle on top and using it as a birthday cake tomorrow.


Clara’s Lemon Angel Pudding


Ingredients:

6 eggs, divided
1-1/2 cups sugar, divided
3/4 cup lemon juice
2 pinches salt
1 envelope gelatin, dissolved in 1/4 cup cold water
1/2 large (or 1 small) angel-food cake, broken into bite-sized pieces
1 cup heavy cream, whipped and sweetened lemon peel for garnish


Instructions:

Beat together the egg yolks, 3/4 cup sugar, the lemon juice, and 1 pinch salt. Cook over a double boiler until the mixture thickens and coats a spoon. Remove the mixture from the heat, and stir in the dissolved gelatin.

Beat together the egg whites, remaining sugar, and remaining salt until stiff. Fold the whites gently into the custard mixture. In a trifle bowl (or another decorative bowl), alternate layers of the custard and pieces of cake, beginning and ending with the custard. Chill the mixture at least from morning to night, preferably for 24 hours.


Just before serving, cover the top with whipped cream, and grate some lemon peel on top for color. Serves 10.


Copyright 2006, Merry Lion Press/Sons & Daughters of Hawley. For more information about the Pudding Hollow Pudding Contest, visit its web page.

Here’s a later update to this post, adding a couple of photographs from my mother’s 90th birthday party, which was a joyous occasion. The first photograph depicts my sister-in-law Leigh and my nephew Michael getting ready to decorate her birthday cake, or rather her birthday cakes; each of them decorated one! The second depicts the finished cakes. You can probably guess who decorated each. Leigh’s aesthetic philosophy is “less is more,” and Michael’s is “more is more.” The final picture is one we all treasure, a photograph of my mother (left) with her younger brother Bruce Hallett and baby sister Lura Hallett Smith. We were thrilled to have all three siblings together for the celebration.