30 June 2010

Strawberry Key-Lime Bars

I know! This looks more like a wedge than a bar. It was a corner piece……

This cool and cooling dessert fulfills TWO functions on my blog today!

First, it represents June (just in the nick of time!) for my Twelve Cookies of Christmas series.

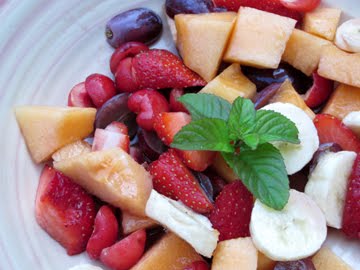
Second, it pays homage to the Mass Farmers Markets Strawberry Dessert Festival, which will run through July 4 at 50 locations throughout the Commonwealth of Massachusetts.

Chefs in restaurants and markets are getting creative with strawberries and donating a portion of the desserts’ revenues to the Federation of Massachusetts Farmers Markets, which supports farmers and markets statewide.

The closest participating restaurants are in Northampton, about an hour away from me. So I’m contributing to the festivities with a homemade (and home enjoyed) strawberry dessert.


The idea for this particular dessert came from the manufacturers of my go-to key-lime juice, Nellie & Joe’s.

I have to admit that I’m ambivalent about whipped topping (a.k.a. Cool Whip). Part of me loves the idea of eating something that resembles whipped cream (sort of) and getting by with very few calories.

Another part of me thinks about the ingredients and shudders. Basically, as you probably know, the stuff contains corn syrup, chemicals, and air.

I compromise with my principles by not eating it very often. My mother (who likes these bars very much, by the way) taught me to follow a path of moderation whenever possible.

Someday I may try making a key-lime pie with fresh strawberries and eschew the whipped topping.

In warm weather it was very handy to make this no-bake dessert, however.

So here are the bare bars.

One word of warning: Be careful during the folding process not to hold anything slippery. As I was attempting to take a photo of the folding process, my little pink camera slid right in. SO FAR it appears to have survived. Luckily, the bars are pink so any staining that might have occurred is not discernible.


The Bars

Ingredients:

2 cups cut-up strawberries
1/4 cup sugar
1 smidgeon butter
1/2 cup (1 stick) butter
1/2 cup sugar
2 cups crushed graham crackers or pretzels (If you choose to use the pretzels—which give the bars a nice salty crunch—be sure to crush these pesky critters in a food processor; you need to get them as fine as possible. I may actually have quit a little early!)
1 14-ounce can sweetened condensed milk
1/ 2 cup key-lime juice
8 ounces whipped topping, cold but not frozen

Instructions:

The day before you want to make the bars combine the strawberries and sugar in a saucepan. Let them sit until they juice up (an hour will probably do).

Bring the strawberry mixture to a boil, and stir in the butter. Reduce the heat and simmer until the strawberries are jam-like but not completely solid, stirring from time to time. The time needed will depend on the juiciness of your strawberries and the degree of heat your stove emits on “low”; my fairly firm berries and gas stove took about half an hour.

Remove the mixture from the heat and stir for five minutes, breaking up pieces of strawberry if they remain. Refrigerate the mixture overnight.

The next day line a 9-by-13-inch pan with foil. Melt the butter. Add the sugar and cracker or pretzel crumbs, and press the mixture into the pan. Set aside.

Beat together the strawberry mixture, condensed milk, and key-lime juice. Fold in the whipped topping. Mix thoroughly but gently.

Use a spatula to spread the strawberry mixture on top of the crumb crust. Cover the pan carefully (avoid hitting the top of the bars with your cover!) and freeze the mixture for 6 hours or overnight.

Let the bars stand at room temperature for 15 minutes before slicing and serving. Makes 24 or more bars, depending on how small you slice them.

It pains me to admit it, but my young friend Audrey looked much cuter holding the bars than I did.

If you enjoyed this post, please consider taking out an email subscription to my blog. Just click on the link below!

Subscribe to In Our Grandmothers’ Kitchens by Email.

28 June 2010

To Be Perfectly Frank: 100 Years of Frank Loesser

Tomorrow will mark the 100th anniversary of the birth of American composer and lyricist Frank Loesser.

Loesser was born on June 29, 1910, in New York City and died in 1969. He wrote or co-wrote some of our most singable songs—“On a Slow Boat to China,” “Heart and Soul,” “Luck Be a Lady Tonight,” “Two Sleepy People,” “Praise the Lord and Pass the Ammunition,” and about 700 others.

I’ve read a fair amount about Loesser, but I feel as though I don’t really know him. In books he comes across as contradictory. He rejected his family’s love of classical music yet longed to write an American opera. He was moody and quick to anger yet nurturing of his peers. He worked far too many hours yet loved parties.


The man I can’t quite find in print comes across in his music as brilliant, playful, and intuitive. He knew how to structure a musical number so that it was easy to sing yet constantly surprising. And he knew how to reveal character through song.

His Guys and Dolls, to me the quintessential Broadway musical, illustrates this attention to character. Nathan Detroit’s passive yet sincere love for his longtime fiancée shines through “Sue Me.”

Sky Masterson shares his love of the city and his secret longing for connection to others in “My Time of Day.” Shy-no-more heroine Sarah lets her wild side peal in “If I Were a Bell.” And Miss Adelaide’s language and lifelong dilemma are defined in “Adelaide’s Lament.”

The lament exemplifies one of Loesser’s other strengths—his ability to translate colloquial conversation into music and lyrics. Miss Adelaide’s voice goes up (as mine certainly would!) whenever she gets particularly agitated contemplating her perpetually ALMOST married state:

When they get on the train for NIAG’RA
She can hear CHURCH bells CHIME.
The COMPARTMENT is AIR CONDITIONED
And the MOOD sublime.
Then they GET OFF at SARATOGA
For the FOURTEENTH TIME!!!
A person can develop la grippe….


I look forward to learning more about Loesser tomorrow evening as I remain glued to the TV (well, actually, I’ll probably save some of the material for later viewing via TiVo) watching Turner Classic Movies’ salute to Loesser.

The lineup will include How to Succeed in Business without Really Trying (1967; star Robert Morse will co-host the TCM evening!), the 2006 documentary Heart & Soul: The Music of Frank Loesser, and several other films.

Although there are several gems to choose from I wish one of the films were Hollywood Canteen (1944), which features Bette Davis singing (!) the first Loesser song I ever performed, “They’re Either Too Young or Too Old.”

I couldn’t dream of emulating La Bette’s perfect diction. On the other hand, I can of course sing rings around her.

I’ll also learn about Loesser as I rehearse for—you guessed it—MY OWN LOESSER CENTENNIAL TRIBUTE WITH ALICE PARKER!

This will take place on Saturday, August 21, at the Green Emporium in Colrain, Massachusetts. (See fabulous poster below.)


Alice and I are still planning the program so if readers have a favorite Loesser song they should suggest it now!

Meanwhile, in tribute to tomorrow’s anniversary here is a special seasonal cocktail. It’s appropriate for two reasons. First, it was invented by my friend Michael Collins, the chef at the Green Emporium.

Second, I MUST have something to hold in my hand when Donald Freeman and I perform “Baby, It’s Cold Outside,” another song that shows off Loesser’s way of turning conversation into song.

“Baby” is one of Loesser’s famous overlapping songs, in which characters (in this case “The Wolf” and “The Mouse”) sing complementary music and lyrics over each other.

According to Loesser’s daughter Susan, the composer and his first wife Lynn Garland Loesser performed this song privately many times. She quotes her mother as saying:

We got invited to all the best parties for years on the basis of “Baby.” It was our ticket to caviar and truffles. Parties were built around our being the closing act.

(Time Life)

Eventually, Loesser sold the song to MGM to be sung by Esther Williams and Ricardo Montalban in the 1948 film Neptune’s Daughter.

Lynn Loesser was deeply saddened, but “Baby” won her husband his only Academy Award for best song. (As time went by he managed to scoop up a couple of Tonys and a Pulitzer as well.)

On August 21 as Don (doing his best Ricardo Montalban impression) finishes the line, “Beautiful, please don’t hurry,” I’ll pop in with,

“Well, maybe just a half a drink more………….”

Let’s all raise our glasses to an American original!


“Baby, It’s NOT Cold Outside” Strawberry Rhubarb Daiquiri

Chef Michael Collins informs me that he was inspired to create this cocktail by my late neighbor Florette, who made a mean rhubarb tea.

I have tried it three ways—with rum (as described below) at his restaurant, with a little Grand Marnier at home when I couldn’t find rum, and in “virgin” form with a little pink lemonade for my young friend Audrey. I like it all three ways.

Ingredients:

for the base:


6 cups water
1 cup sugar
2 cups chopped rhubarb
2 cups strawberries, cut in half
1/2 lime
1 tablespoon grenadine (optional–for color; I found with really fresh fruit I didn’t necessarily need it)

for the cocktail:

1 cup cocktail base (see above)
2 ounces white rum
lime juice as needed for rimming
sugar as needed for rimming

Instructions:

Bring the water to a boil. Add the sugar and stir. When the sugar has dissolved add the fruit.

Reduce the heat to very low and simmer, uncovered, for 20 minutes, until the fruit breaks down. Toward the end of this process add the grenadine if you are using it.

Allow the mixture to cool. Remove the half lime (DO NOT FORGET THIS STEP!), and place the liquid in a blender in batches. Blend it; then strain it, first through a strainer (don’t try to push the fuzz down through the holes) and then through cheesecloth.

Place it in a jar and keep it refrigerated until it is needed.

To make a cocktail (or two): Place the rum in a cocktail shaker, and add ice. Pour in the cup of cocktail base. Shake.

Pour a little lime juice around the rim of 1 large or 2 small glass(es), and dip it/them in sugar so that the sugar coats the rim(s). Strain the drink into the glass(es).

The drink recipe serves 1 to 2. The base makes about 6 cups.

Audrey drank this cocktail with pink lemonade instead of rum.

If you enjoyed this post, please consider taking out an email subscription to my blog. Just click on the link below!

Subscribe to In Our Grandmothers’ Kitchens by Email.

26 June 2010

Scooping up a Sofi


Dave Wallace of Bittersweet Herb Farm in Shelburne, Massachusetts (two towns away from my home in Hawley!), has a smile on his face this week. His wife Jill and son Miles are feeling pretty perky too, as you can see from the picture above ( which comes courtesy of Bittersweet Herb Farm).

One of this family company’s classic products, its Spices of India mix, has made it to the finals in the sofi awards.

“Sofi” is an acronym for “specialty outstanding food innovation.” The awards are sponsored by the National Association for the Specialty Food Trade, which will hold its annual New York Fancy Food Show beginning tomorrow, June 27, and running through Tuesday the 29th.

“The NASFT is the biggest gourmet food organization in the country, and the Fancy Food Show is the premiere show in the country and perhaps in the world,” Dave told me recently. “It’s a major event.”

I love the Fancy Food Show. What food writer could resist wandering through the Javits Center in New York encountering aisle upon aisle of things to taste? I’ll miss the show this year—although to tell you the truth my feet and my digestive system won’t! It was nice to have a chance to talk to Dave about it.

He explained that his company seldom misses a Fancy Food Show. Asked what he gets out of exhibiting there, he mused, “You get some orders. You don’t get a lot of orders.

“You get a lot of contacts. Everybody in the food industry goes there. We come home with probably about 200 leads that we spend pretty much the rest of the year following up on.”

For this year’s sofis about 2000 products were submitted by food companies throughout the world. Bittersweet’s spice mix is one of four finalists in the category “appetizer, antipasto, salsa, or dip.”
At the Food Show the NASFT will ask 300 buyers to rate the finalists. The grand-prize winners will be announced at a reception Monday evening.

Even if Bittersweet’s spice mix doesn’t get first prize in its category, Dave explained, he and his family will still be winners.

“You’re awarded a silver medal just by being a finalist. It is a big deal. We talk about waiting till the show to find if we won but in reality we’ve already won,” he noted. “To be among such a select group of products is definitely an honor.”

Beyond the honor, Dave observed that he is already gaining attention and orders from buyers because of his silver medal.

Perhaps ironically, the Spices of India mix is not a new product. “Actually it’s one of our original seasonings, which would make it about 27 years old,” said Dave. “I’ve loved Indian food since as long as I can remember.”

He didn’t necessarily expect the spice mix to win, he admitted. “Indian food or Indian cuisine seems to be the trend of the year. I noticed that there were several products with Indian flair [in the finals]. We just happened to enter the right product at the right time.”

Dave said that he had actually expected one of Bittersweet’s newer products to be nominated for a sofi—perhaps its wild blueberry and limoncello jam (excellent in crepes or tarts) or its new southwest seasoning mix, which the Wallaces like to combine with mushrooms, onions, vegetable sausage, and cheese for a southwest egg scramble.

“Life would be much easier if I had a crystal ball,” Dave chuckled.

Asked about his favorite way to use the Spices of India mix, he responded, “I make a sauce, a very quick and easy sauce with unsweetened coconut milk—an eight-ounce can—and two tablespoons of the Spices of India (or to taste). I heat it up and add a little salt and pepper. You can use it as a sauce on just about anything: fish, chicken, lamb vegetables.

“Or I just add a pinch to my tuna salad, egg salad, chicken salad.”

He explained that the mixture is popular because it is spicy but not necessarily hot.

“We do a lot of these consumer shows. People are afraid to try it because they’ve had a negative experience with Indian spices being too hot. They’re surprised at how mild it is, how flavorful it is.”

The judges in New York will try the spice mixture in one of the recipes featured on the label, probably the first recipe given, which makes a creamy, flavorful cheese spread. Dave gave me a jar of the spices so I made the spread for friends recently. Everyone loved it.

The mayonnaise made the cream cheese a little less heavy, and the spice mix really brought depth to the cheese. The recipe appears below.


Bittersweet Herb Farm Spread of India

Ingredients:

1 cup cream cheese, softened
1 cup mayonnaise
2 tablespoons Spices of India mix

Instructions:

Blend the cream cheese and mayonnaise and stir in the spices.

Chill in the refrigerator for at least 30 minutes. (A little longer is a little better!)

Serve with crackers, pita chips, or vegetables. Makes a little less than 2 cups of spread.

Courtesy of the NASFT. Photography by Mark Ferri.

If you enjoyed this post, please consider taking out an email subscription to my blog. Just click on the link below!

Subscribe to In Our Grandmothers’ Kitchens by Email.

24 June 2010

World Cup Fruit Cup

My friend Alice Little Grevet, who lives in Paris (lucky Alice!), came up with this recipe title.

Alice is one of those people who frequently paste the word “Gooooooooaaaaaal!!!” on their Facebook pages at this time of year.

Like many people living in the United States, I am following the World Cup only peripherally —primarily by watching British humorist John Oliver’s commentary on The Daily Show with Jon Stewart.

I’m impressed (but not enough to watch an entire match) that the U.S. team actually appears to be holding its own in the competition—so far, at any rate—but not in any arrogant fashion.

Rooting for the U.S. in the World Cup is rather like rooting for the Red Sox in the good old days when they lost all the time. It’s genteel.

My fruit cup is also relatively genteel, I hope. It is the only international fruit cup recipe I have, given to me years and years ago by a Spanish woman living in France.

I’ve written here before about Paris en Films, the film festival organized by my honorary godmother, Dagny Johnson. During my first summer working with the festival we were housed in a one-bedroom apartment on the Avenue Victor Hugo in Paris.

Despite its relative paucity of rooms the apartment was quite grand, with panels of mirrors on the walls that made it appear even grander. We rented it from a Spanish nobleman. Our landlord owned a building in Paris so that he could stay there from time to time and watch marathon features of pornographic films, which were banned in Franco’s Spain.

I found this bizarre. I guess it’s no odder than keeping an apartment in Paris so one can eat the food or go to the museums or look at the gorgeous city, all of which sound perfectly rational to me. But I was a very naïve teenager.

Through this nobleman Dagny found our cook/housekeeper, Nieves Garcia. Madame Garcia’s husband worked at the Spanish Embassy.

Madame Garcia was a perky suicide blonde who seemed to have a perpetual smile on her face. She wasn’t actually a terrific cook (she had only about four dishes in the repertoire she served our guests), but she had an aura about her that defied anyone to criticize her culinary talents


My favorite among Madame Garcia’s kitchen creations was her signature fruit cup.

She used whatever fruit was at hand and gave it a little extra zip with sugar, orange juice, and anise liqueur.

In honor of Madame Garcia and of soccer players everywhere I offer her recipe. I tried to find international fruits and juices when I tested it this week. Unfortunately, the only exotic fruits available at my local general store were bananas.

Feel free to add any international fruits you can find—and perhaps to substitute some Brazilian cashew juice (if you can find that) for the o.j.

Although you may of course use another liqueur in place of the anise I counsel against it. The licorice taste contrasts nicely with the sweetness of the fruit and really makes this dish.

Your guests may well yell “Gooooooooaaaaaal!!!” as they eat.


Madame Garcia’s Spanish Parisian Fruit Cup

Ingredients:

6 cups assorted fruit
2 tablespoons sugar (or to taste)
2 tablespoons orange juice (or to taste)
2 tablespoons anise liqueur (or to taste)

Instructions:

Place the fruit in a pretty bowl. Measure out the remaining ingredients in the order in which they appear above.

Allow the fruit to marinate for at least 15 minutes. Serves 6.


If you enjoyed this post, please consider taking out an email subscription to my blog. Just click on the link below!


Subscribe to In Our Grandmothers’ Kitchens by Email.

22 June 2010

For Rhubarb Lovers ONLY: Grilled Rhubarb

I know I don’t usually publish posts two days in a row. I do realize, dear readers, that you have OTHER THINGS TO DO than read about my cooking.

I’m running out of time to celebrate everything I need to by July 4, however, so I’m afraid I’m back today with another rhubarb recipe.

Actually, I was a little hesitant to try this one. It involves … grilling.

I’m not generally a sexist, but there are certain things I’d just rather have men do. Change batteries on high smoke alarms (thank you, David!). Fasten the hose to the faucet outside so the water doesn’t gush out (thank you, Dennis!). GRILL.

Last night was hot, however, and no men were in sight. So I pulled out the grill and the charcoal and eventually got a fire going. My mother, Truffle, and I enjoyed a marinated flank steak.

And … grilled rhubarb!

Ann Brauer, a talented quilt artist in Shelburne Falls, Massachusetts, suggested I try tossing my favorite stalk on the grill.

I was skeptical. I have been known to lose pieces of chicken through the slots of the grill. I had a feeling I would end up with more rhubarb in the fire than on top of it.

Ann told me that she had grilled her rhubarb on foil, however, which made the project much more doable.

The grilling is a teensy bit tricky anyway. As I state in the recipe below, one wants the rhubarb to become slightly soft but not mushy. The photo at the bottom of this post actually depicts my first batch, which was slightly underdone; you can still see sugar adhering to the stalks. By the time we finished the final batch we were so hungry we ate the darn things without photographing them, however.

Warning: I know I’ve said that several of my rhubarb recipes will appeal to people who are not rhubarb fans.

This is NOT one of those recipes. If you are a lover of rhubarb, however, you will be enamored of the contrast between the light sugary crust and the deep, tart, rhubarby inside of the grilled stalks.

My mother and I were very, very happy. Truffle even ate a couple of pieces. (She’s a dog with excellent taste.)

Grilled Rhubarb

I apologize for the vague proportions in this recipe! My mother and I ate about 4 pieces of rhubarb each, but people with bigger appetites would probably eat many more. So I leave the decisions to you…….

Ingredients:

rhubarb to taste–washed, trimmed, and cut into 3-inch pieces
sugar as needed

Instructions:

Rinse the rhubarb pieces well and barely drain them. Leave a little water adhering to them so that the sugar will stick to them.

Pour sugar into a flat bowl, and roll the pieces of rhubarb in it.

Grill on foil over a not-too-hot grill, turning from time to time, until the sugar melts and the rhubarb starts to soften but doesn’t completely lose its texture. On my grill this took about 15 minutes, but I am NOT a reliable griller. Keep an eye on your rhubarb and pay no attention to me!

Remove and serve.


If you enjoyed this post, please consider taking out an email subscription to my blog. Just click on the link below!

Subscribe to In Our Grandmothers’ Kitchens by Email.

21 June 2010

Barbacious Brownies

I admit that I put rhubarb in a lot of things. This is one ‘barb recipe that would never have occurred to me, however.

I got the idea for these fudgy squares from Dennis Duncan of High Altitude Rhubarb, a bustling organic rhubarb farm in the foothills of the Rocky Mountains in Colorado. Like me, Dennis is a major rhubarb fan.

Dennis was a little vague about how much rhubarb to add to the brownies, suggesting that I simply add unsweetened rhubarb to my favorite brownie recipe. So I just punted. I wasn’t sure whether the brownies were a success … until my neighbors started asking for more!

The result was a moist, DARK-chocolate brownie. Be prepared for a definite tart taste from the rhubarb. Your friends may not be a able to figure out what’s in the brownies, but if they’re fans of dark chocolate they’ll definitely be happy.

By the way, High Altitude Rhubarb has a number of recipes available on it web site. My family is lobbying to try the rhubarb margaritas!


Ingredients:

1/2 cup (1 stick) sweet butter
1/2 cup unsweetened rhubarb puree, slightly warm
1 cup sugar
1/3 to 1/2 cup Dutch process cocoa (depending on how dark you want them; they’ll be dark either way!)
1/4 teaspoon salt
2 eggs
1/2 cup flour
2 teaspoons vanilla
1 cup chocolate chips

Instructions:

Preheat the oven to 350 degrees. Generously butter a 9-inch-square pan. (Line it with buttered foil to omit any worries about sticking. I used a silicone pan so I didn’t have to.)

In a 2-quart saucepan melt the butter. Stir in the rhubarb, followed by the sugar. Heat, stirring, over medium heat until the sugar dissolves. Remove from heat.

Stir in the cocoa and salt. Beat in the eggs 1 at a time. Stir in the flour, followed by the vanilla and the chocolate chips.

Spoon the batter into the prepared pan.

Bake the brownies for 25 minutes. Remove them from the oven. Loosen the edges gently with a table knife; then allow the brownies to cool. Cut into tiny pieces. Makes between 20 and 40 brownies, depending on how big you cut them.


If you enjoyed this post, please consider taking out an email subscription to my blog. Just click on the link below!

Subscribe to In Our Grandmothers’ Kitchens by Email.

18 June 2010

Very Berry Salad


We’re lucky enough to be enjoying lovely fresh baby spinach right now in my corner of Massachusetts.

My mother and I have been wallowing in it! First, we purchased a bag at the new Charlemont Farmers Market from Sheila Velazquez of Pen and Plow Farm in Hawley.

A couple of days later we went to pick up a share at our CSA, Wilder Brook Farm in Charlemont, and we were treated to more spinach!

Kate and John at Wilder Brook also gave us some lovely strawberries—tiny, almost wild ones. In addition, among other veggies they handed out a root called hakurai. Hakurai is white and resembles a radish although it may be a little sweeter.

I decided to put together a salad featuring the spinach and some of our other goodies. I don’t believe one can ever have too many strawberries when they are in season so I used them in the vinaigrette as well as the salad.

The strawberry vinegar recipe I employed is from my Pudding Hollow Cookbook. Of course, I assume that everyone reading this blog either owns this lovely tome or is about to buy it! Just in case you’re waiting for a special occasion to add it to your cookbook library, I’m giving you the vinegar recipe here.

I haven’t specified exact measurements for the vinegar or a yield because the proportion of liquid you get from this recipe depends upon the juiciness of the berries you use—and how many you choose to use!

Do try this salad. It’s sweet with a touch of savory. The contrasting textures of the spinach, berries, hakurai, and cheese really work together. My mother looked doubtful when I put it in front of her, then promptly ate every bite and asked for more…….


Ingredients:

for the strawberry vinegar:

strawberries (don’t use too many at a time or this will take forever)
enough distilled white vinegar to cover them
equal amounts of sugar and water

for the salad:

1/2 pound fresh spinach
4 small or 2 larger (more or less to taste) hakurai bulbs (use radishes if you don’t have hikurai), thinly sliced and cut in half if they seem a little big
15 to 20 tiny strawberries
crumbled feta cheese to taste

for the vinaigrette:

2 tablespoons extra-virgin olive oil
1 tablespoon strawberry vinegar
salt and pepper to taste

Instructions:

The day before you want to eat your salad (or any time up to a year before!) start the vinegar.

Place the berries in a non-aluminum pan (I use a porcelain dish). Cover them with the vinegar, and leave them to soak, covered, overnight. If you forget them for a day and wait 2 nights, they will still be fine.

The next day (or the day after that), gently strain the juice through cheesecloth. You may squeeze the berries a little, but don’t overdo; letting the juice drip out on its own is best.

Measure the juice. Then measure a little under 1-1/2 times as much sugar and water as juice (i.e., if you have a cup of juice, use just under 1-1/2 cups of sugar and 1-1/2 cups of water) into a saucepan.

Cook the sugar/water mixture until it threads. Measure the resultant sugar syrup. Add an equal quantity of berry juice to it, and boil the mixture for 10 minutes. Strain this boiled vinegar through cheesecloth, and decant it into sterlized bottles. Cork or cover. Stored in the dark, strawberry vinegar should keep its color and flavor for up to a year.

When you’re ready to make the salad, combine its ingredients in a pretty bowl.

Combine the vinaigrette ingredients in a small jar with a tight lid. (Depending on your taste, you may want a little more or a little less dressing than I specify here, but the oil/vinegar proportion of 2 to 1 should hold.)

Shake to combine, and toss the vinaigrette onto the salad. Serves 4 generously.

If you enjoyed this post, please consider taking out an email subscription to my blog. Just click on the link below!

16 June 2010

Chocolate-Covered Strawberries


Like many sweet lovers in Franklin County, Massachusetts, I make a pilgrimage each year in June or early July to Richardson’s Candy Kitchen in Deerfield for chocolate-covered strawberries. The store indicates that the strawberries have arrived by setting a giant fake fork spearing an equally fake strawberry on the front lawn.

The strawberries at Richardson’s are delectable. They feature a layer of filling between strawberry and chocolate that is particularly appealing. Of course, these treats have to be eaten within 24 hours—but my family never seems to have trouble with that rule!

The version below omits the filling since I have no idea how Richardson’s manages to put it inside the chocolate. The recipe merits making nonetheless. How can you go wrong with strawberries and chocolate?

I apologize for the vagueness of the list of ingredients. Basically, one uses as much chocolate as one likes (or has). I had a lot so I used about 1-1/2 to 2 ounces per strawberry, which was definitely excessive. Since I only make these treats once a year I don’t mind a little excess. But you may definitely use less chocolate than I did.

I suggest using good chocolate rather than chocolate chips. The chips fit around the berries very well since they have extra ingredients that make them congeal. Plain chocolate tastes a little better, however. And if you use white chocolate, make sure it is indeed white chocolate and not some white “confection.”

Ingredients:

strawberries to taste (you really don’t need more than 1 or 2 per person)
chocolate to taste—milk, dark, white, or a combination

Instructions:

Gently rinse the strawberries and drain them thoroughly.

In the bottom of a double boiler boil an inch or two of water. If you don’t have a double boiler, use a wide shallow pan such as a frying pan. Find a heat-proof bowl or saucepan to put inside. (Obviously, if you are using more than one chocolate, you will need more than one double boiler and/or set of pans.)

While the water is coming to a boil, chop the chocolate into small fairly uniform pieces. Turn off the heat below the water, and place the chocolate in a pan or bowl on top. Stir the chocolate as it melts over the hot water.

When the chocolate has melted, remove it from the water, carefully wiping the outside of its bowl or pan. Let it cool for a few moments so that it won’t make your strawberries go bad before you get a chance to eat them! Carefully dip each strawberry in the chocolate, holding it by the hull. Place the covered strawberries on a silicon- or wax-paper-covered plate to cool. As soon as they are at room temperature either eat them or pop them into a covered container to cool in the refrigerator until you are ready to eat them.

Enjoy within 24 hours.


If you enjoyed this post, please consider taking out an email subscription to my blog. Just click on the link below!

Subscribe to In Our Grandmothers’ Kitchens by Email.

14 June 2010

Chicken and Asparagus Stir Fry

I’m afraid this may be my last asparagus recipe for the season. (Sob!) I’ll keep eating asparagus, of course. But it is beginning to disappear from our local farm stands.

I’m always up for a stir fry. You can do the chopping in advance and just throw the thing together in minutes.

This recipe is flexible. You may add just about any vegetables you like. I’ve used peppers, water chestnuts, and broccoli. I just look in the refrigerator! And I don’t see why vegetarians couldn’t substitute tofu for the chicken.

You may also skip parboiling the asparagus and carrot pieces, but then you will have to cook this dish longer.

The Stir Fry

Ingredients:

for the marinade:


4 teaspoons low-sodium soy sauce
4 teaspoons dry sherry
2 teaspoons cornstarch
1 tablespoon canola or peanut oil

for the sauce:

6 tablespoons low-sodium soy sauce
2 tablespoons dry sherry
2 tablespoons rice vinegar
2 teaspoons sugar
1 teaspoon cornstarch paste (1 teaspoon cornstarch dissolved in a little water)

for the stir fry:

canola or peanut oil as needed for frying
2 boned, skinned chicken breasts, chopped into bite-sized pieces
crushed red pepper to taste (I used about 3/4 teaspoon)
1 large or 2 small green onions (mostly white part), finely chopped
2 garlic cloves, finely chopped
1/2 cup asparagus, chopped into bite-sized pieces and parboiled for 2 minutes
1 large carrot, cut into bite-sized pieces and parboiled for 2 minutes
a splash of sesame oil

Instructions:

Combine the marinade ingredients in a medium bowl. Combine the sauce ingredients in a small bowl. Add the chicken pieces to the marinade. Let them marinate for 15 minutes.

In a wok or heavy frying pan heat enough oil to lightly cover the bottom of the pan. When it the oil is hot drain the chicken (reserving the marinade) and lightly brown the pieces, stirring. Toss in the red pepper and stir briefly.

Remove the chicken from the pan or move it to the sides. Quickly add and stir fry the onion and garlic pieces for a minute or two; then add the remaining vegetables. Stir fry for 1 to 2 more minutes. Return the chicken to the pot, add the sauce and the reserved marinade, and cook until the sauce thickens slightly and has coated all of the food. (This shouldn’t take more than a couple of minutes.)

Remove the pan from the heat and toss in the sesame oil. Serve over rice.
Serves 4.


If you enjoyed this post, please consider taking out an email subscription to my blog. Just click on the link below!

Subscribe to In Our Grandmothers’ Kitchens by Email.

11 June 2010

Upside Down Once More (Hawley Rhubarb Upside-Down Cake)

I know, I know, I just posted a recipe for rhubarb upside-down cake!

Let me explain.

After various peregrinations I am finally home in Hawley, Massachusetts, contemplating the gorgeous greenery everywhere and the abundant rhubarb in my yard.

(It’s even more abundant in the yard of my generous next-door neighbor Dennis!)

Seeing its lush (if poisonous) green leaves and strong red stalks has inspired me to try yet another upside-down cake.

You may recall that the previous recipe from Sue Haas featured marshmallows. This ingredient surprised some of the commenters, particularly the eloquent Flaneur.

Here I dispense with the marshmallows and combine Sue’s recipe with my own for pineapple upside-down cake.

It’s amazing how different two rhubarb cakes can be! Of course, I like them both. (I seldom dislike cake, for my sins.)

Sue’s Michigan upside-down cake is not too sweet and not too goopy; the marshmallows hold it together and give it a slight vanilla flavor.

This version is definitely sweeter and richer. On the other hand, it’s also a little more rhubarby. The marshmallows tend to tame the rhubarb in the other recipe.

Which should you make? BOTH, of course………


Hawley Rhubarb Upside-Down Cake

Ingredients:

for the topping:

1/4 cup (1/2 stick) sweet butter
3/4 cup brown sugar, firmly packed
2 cups rhubarb (1/2-inch chunks)

for the cake:

1/2 cup (1 stick) butter, at room temperature
1 cup sugar
2 eggs
1/4 teaspoon salt
1 tablespoon baking powder
1-3/4 cups flour
1/2 cup milk
2 teaspoons vanilla

Instructions:

Preheat the oven to 350 degrees.

First make the topping (which goes on the bottom!).

Melt the butter in a saucepan. Stir in the brown sugar and cook, stirring, until it melts and bubbles—3 to 4 minutes.

Transfer the brown-sugar mixture into a 9-inch-square cake pan. Spread it through the bottom of the pan. Arrange the rhubarb pieces on top as artistically as you can. (Mine weren’t very artistic.)

For the cake cream together the butter and sugar. Beat in the eggs, 1 at a time. Add the baking powder and salt. Stir in the flour alternately with the milk, beginning and ending with the flour. Stir in the vanilla, and pour the batter over the rhubarb mixture.

Bake the cake until a toothpick inserted into the center (but not too far down; don’t hit the rhubarb!) comes out clean, about 40 minutes. If the cake is brown but not done before this happens, decrease the oven temperature and continue baking.

Allow the cake to cool for 5 to 10 minutes. Loosen the edges with a knife, and invert the cake onto a serving plate held over the skillet. Turn upside-down. Remove pan.

Serve alone or with whipped cream. Serves 9.

I should think you could absolutely bake this pan in a 10-inch iron skillet (heating the butter and brown sugar in it first, and then piling on the other ingredients). I couldn’t find my skillet, however, so I used a square pan and can only report on those results.

If you enjoyed this post, please consider taking out an email subscription to my blog. Just click on the link below!

Subscribe to In Our Grandmothers’ Kitchens by Email.

09 June 2010

Stockton Asparagus and Chicken Enchiladas

This creamy casserole comes from a small, gem-packed cookbook sent to me by the Stockton Asparagus Festival in Stockton, California. I think next time I may try spicing it up a little—or maybe not! My family ate every bite of it this way.

In my constant quest for spice I often forget that mild flavors can be appealing as well.

The original recipe called for 3 to 4 cups chicken broth. I used 4—and as you can see from the photo below my enchiladas were very wet! So I suggest sticking to 3………

Have fun!


Asparagus and Chicken Enchiladas

Ingredients:

2 pounds asparagus, cut into 1-inch pieces
12 tortillas (I used flour)
oil as needed for softening tortillas
1/2 cup (1 stick) sweet butter
1/2 cup flour
3 cups chicken broth
1 cup sour cream
1/2 cup salsa verde (a little more if you like)
3 cups (generous) grated cheese—Monterery Jack or sharp cheddar or a mixture of the 2
2-1/2 to 3 cups cooked, shredded chicken
1/2 cup chopped onions

Instructions:

Blanch the asparagus for 2 minutes. Cool them with ice cubes and drain them; set them aside.

Preheat the oven to 425 degrees.

Cook each tortilla briefly on both sides in an oiled skillet until it softens. Set the tortillas aside to drain and cool.

In a saucepan melt the butter. Whisk in the flour for a minute; then whisk in the broth. Cook until thick and bubbly, stirring constantly.

Add the sour cream and salsa; heat thoroughly. Remove from heat.

Mix together 2 cups of the cheese, the chicken, the onion pieces, and the asparagus. Divide this mixture evenly among the tortillas, and top each with 3 tablespoons of sauce.

Roll up the tortillas and place them, seam-side down, in a 9-by-13-inch baking dish. Sprinkle with the remaining sauce and cheese.

Bake for 25 minutes. Serves 6.


If you enjoyed this post, please consider taking out an email subscription to my blog. Just click on the link below!


07 June 2010

Rhubarb Catch Up (a.k.a. Ketchup)

Here’s an early recipe for July 4. (Enjoy it: this will probably be the only time you’ll get a recipe early from In Our Grandmothers’ Kitchens!)

I’m not exactly a champion griller. In fact, as listeners to WFCR, our local public-radio station, learned a couple of years ago, I’ve been known to light an outdoor fire that almost turned into … well … an outdoor fire.

Condiments for grilled foods I can manage, however. And lately I’ve had a hankering to make some rhubarb ketchup (or catsup or however you want to spell it).

I’ve tried a couple of different formulas, and this is the best so far. It doesn’t taste like tomato ketchup. Why should it? It’s a lightly sweet, lightly spiced sauce that would be lovely with pork.

My spices came courtesy of Kalustyan, a wonderful spice company that has a retail outlet in New York City (yes, it will ship spices to you!). I particularly love Kalustyan’s aromatic cinnamon. And its mixture of pickling spices was just right for this recipe.

I can’t tell you yet how long this ketchup will last in the refrigerator since I made it less than a week ago. I don’t think I’d push it more than two weeks or so. So if you would like to try it as a condiment for Independence Day you should wait a little while to make it.

On the other hand, like me, you might want to make some now and some later. It really was tasty last night! I pan grilled chicken cutlets and served them with fresh peas with mint and maple-rhubarb coleslaw.

While you’re making your ketchup, do listen to my WFCR grilling broadcast. I’m not in great voice when I sing (and the less said the better about my piano playing), but my mother’s childhood memories are fun.

And Truffle’s cheerful bark more than makes up for my shortcomings! She really knows how to celebrate Independence Day.


Rhubarb Ketchup

Ingredients:

3 cups rhubarb (in small pieces!)
1/2 cup brown sugar, firmly packed
1/4 cup apple cider plus 1/2 cup later
3 tablespoons cider vinegar
1/4 teaspoon (generous) ground ginger
1/4 teaspoon ground cinnamon
1 pinch ground allspice
1/2 teaspoon pickling spices
1/2 teaspoon salt
a few turns of your pepper grinder

Instructions:

In a 2-quart nonreactive saucepan, toss together the rhubarb and brown sugar.

In a tiny nonreactive saucepan, heat the 1/4 cup cider and the vinegar. When they come to a boil remove them from the heat and stir in the ginger, cinnamon, allspice, and pickling spices.

Let the two pans sit at room temperature for 2 hours. The rhubarb should juice up a little, and the spices should steep nicely in the liquid.

After the resting period add the spices and their liquid to the rhubarb. Toss the remaining cider into the pot that held the spices to pick up any remaining spices, and add it to the rhubarb as well. Stir in the salt and pepper.

Bring the rhubarb mixture to a boil. Reduce the heat and boil the resulting sauce, stirring frequently, for 20 minutes. Turn off and let cool.

In a blender or food processor puree the cooled ketchup. Ladle it into a sterilized jar or two and refrigerate it until you are ready to use it.

Makes about 2-1/2 cups ketchup.

If you enjoyed this post, please consider taking out an email subscription to my blog. Just click on the link below!

Subscribe to In Our Grandmothers’ Kitchens by Email.

04 June 2010

Asparagus Quesadillas

Recently I made a batch of tasty asparagus enchiladas. It’s been so hot lately that I don’t have the heart to post the recipe, however! Presumably we’ll have a cooler spell before summer sets in permanently.

In the meantime, here’s a recipe that doesn’t involve turning on the oven. It’s easy to boot. And it’s extremely toothsome.

I recommend it with all the options, but one of my tasters felt the Prosciutto was out of place (too Italian for a southwestern sandwich) so I am exercising caution in my recipe writing.


Asparadillas

Ingredients:

canola or peanut oil as needed for light frying
1/4 red onion, thinly sliced
1/2 pound asparagus, cut into 1-inch pieces and blanched for 1 minute
lots of freshly ground pepper
4 small flour tortillas
1/2 to 1-1/2 cups grated cheese (cheddar, Monterey Jack, or a blend)
4 slices Prosciutto (optional but good)
chopped cilantro to taste (ditto)

Instructions:

In a small saucepan heat a small amount of oil and sauté the slices of onion until they brown around the edges—about 10 minutes over low to medium heat. Stir in the asparagus, and toss for a minute or two. Grind pepper over the combination and toss again. Remove from heat.

In a larger pan or griddle place a small amount of additional oil and let it heat up. Place the first tortilla in the oil, let it heat for just a moment, and then flip it over. Toss on cheese to taste plus a quarter of the asparagus mixture.

At this point you may add a slice of Prosciutto (for a sort of Italian-American quesadilla) or a little cilantro (for a more Mexican-American quesadilla). Or you may leave well enough alone.

Fold the tortilla in half to seal the quesadilla, and make sure it is brown on both sides.

Remove it from heat and keep it warm while you repeat the process with the remaining tortillas.
Serves 4.


If you enjoyed this post, please consider taking out an email subscription to my blog. Just click on the link below!

Subscribe to In Our Grandmothers’ Kitchens by Email.


01 June 2010

Hooray for Rhubarb (and Rhubarb Upside-Down Cake)!

Sometimes I find it hard to recognize my childhood memories as being about the real me.

I have no trouble recalling the loquaciousness, the adorability, or (I admit it!) the mule-like stubbornness of the young Tinky.

Nevertheless, it’s hard to believe that I spent my earliest years disliking some of the foods I now adore.

I thought spinach was bitter and ugly.

I disliked Chinese food so much that when my parents wanted to teach me to eat with chopsticks they fed me ravioli. (By the way, ravioli are A LOT harder to pick up with chopsticks than most Chinese food.)

And I was determined not to eat rhubarb in any form.

Today I’m thrilled to see fresh spinach at a farmstand. I long for Chinese food regularly.

And rhubarb is probably my favorite fruit. Don’t bother to write in and tell me that it’s really not a fruit. I know. We treat it as a fruit, however.

It’s beautiful. It’s resilient. And it’s versatile. (Gosh, I just realized that I may love rhubarb because IT’S LIKE ME!)

Today I am happy to post my first rhubarb recipe of this spring, courtesy of Sue Haas of Seattle, Washington, a regular reader of this blog. Sue received it in turn from her mother in Albion, Michigan, a bastion of rhubarb almost as strong as my own western Massachusetts.

Their cake is excellent for supper or even for breakfast. The marshmallows (yes, marshmallows!) tone down the tartness of the rhubarb, and the cake is substantial without being over heavy.


Michigan Rhubarb Upside-Down Cake

Ingredients:

for the topping:


3 cups rhubarb (1/2-inch chunks)
3/4 cup sugar
10 large marshmallows, cut in half

for the cake:

1/2 cup (1 stick) sweet butter, at room temperature
1 cup sugar
2 eggs
1/4 teaspoon salt
3 teaspoons baking powder
1-3/4 cups flour
1/2 cup milk
1 teaspoon vanilla

Instructions:

Preheat the oven to 350 degrees. Generously grease a 10-inch iron skillet, and arrange the rhubarb pieces in the bottom. (If you don’t have a 10-inch skillet, use an 8- or 9-inch square baking pan.) Sprinkle the sugar on top, followed by the marshmallows.

For the cake cream together the butter and sugar. Beat in the eggs, 1 at a time. Add the baking powder and salt. Stir in the flour alternately with the milk, beginning and ending with the flour. Stir in the vanilla, and pour the batter over the rhubarb mixture.

Bake the cake until a toothpick inserted into the center (but not too far down; don’t hit the rhubarb!) comes out clean, about 50 minutes. If the cake is brown but not done before this happens, decrease the oven temperature and continue baking.

Allow the cake to cool for 5 to 10 minutes. Loosen the edges with a knife, and invert the cake onto a serving plate held over the skillet. Turn upside down. Remove skillet.

Serve alone or with whipped cream. Serves 12.


If you enjoyed this post, please consider taking out an email subscription to my blog. Just click on the link below!